Pages


Showing posts with label summer. Show all posts

Monday, August 3, 2015

Pink Monday

It's true!
Have a Pink Monday!

Christina xx

Thursday, July 30, 2015

Snapshot


The daily essentials..

 These cat-eyed sunnies
&
These two reminders: 
1. Nobody's perfect.
 2.Everything is OK!

Christina xx

Friday, July 17, 2015

Sole-Mate

Hey everyone--

(So disclaimer, I know I said this post would be up yesterday but I overestimate what I can accomplish in a day. Sorry friends!)

Fred joined me for this shoot and we had such a good time taking these together! We are really lovin' our BEARPAW shoes!

My shoe is the women's 'Magnolia' style in brown textured woven. I'm amazed by how comfy all of my BEARPAW shoes have been. Most heels, even wedges tend to hurt my feet after awhile but I've been impressed. My favorite thing about these are their textured print, soo cute. 

Fred is wearing the men's 'Sean' style in dark brown. Fred liked that they fold down in the back so that they can become a slip-on style. The are so versatile! They're comfy and they look great on.  
& Fred made them look really great. :D :D :D

Have a sweet day!

Christina xx

Monday, July 6, 2015

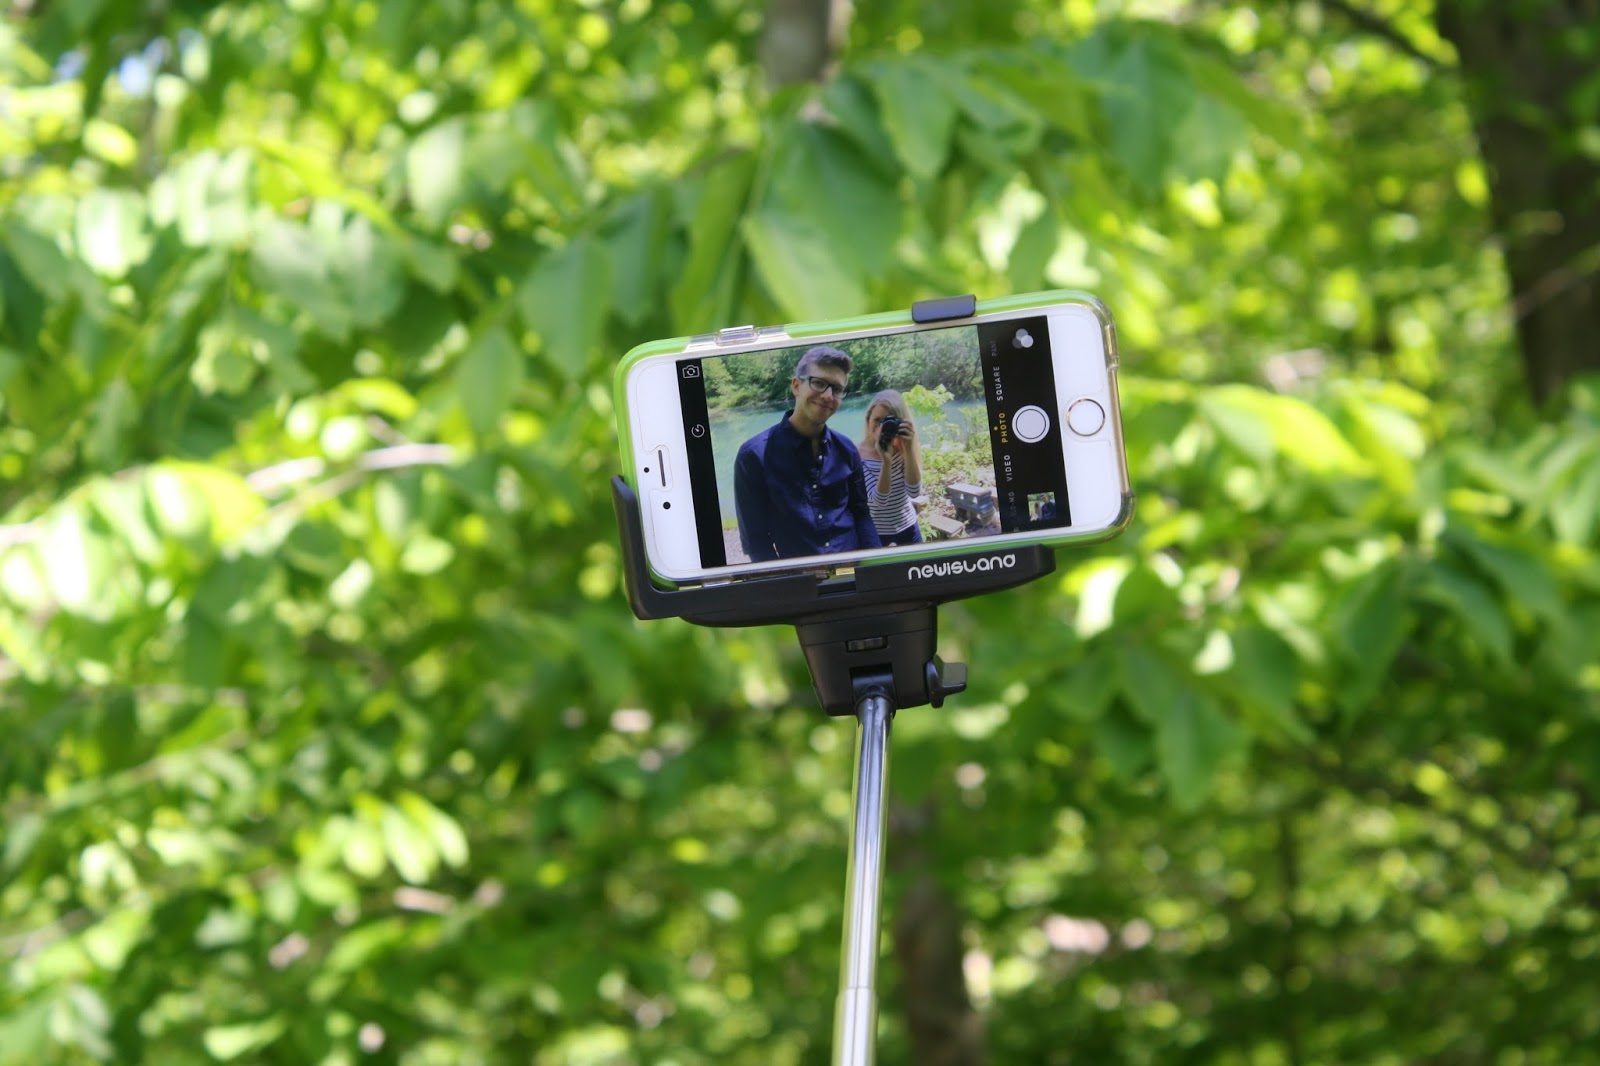
The Daily Sugar x Newisland Selfie Stick

Hey everyone--

So this post is pretty special for two reasons:
1. This selfie stick is super cool!
2. I'm introducing my boyfriend Fred to all of you! & He's the coolest.

We had so much fun adventuring and playing around with this Newisland Self-portrait Monopad "selfie stick". I had no idea all the things that it could do. I didn't know that you could connect your phone to the Bluetooth and control the buttons that way, but you can! It's really awesome! It has an adjustable 180 degree head, which allows you to position it according to each specific shot. It can also stretch to be crazy long. 

So here's how you use it:
1. Before you use your stick make sure that it's charged and ready to go!
2. Pull the sides of the actual holder on the stick to stretch it and make room for the phone.
3. Place your phone in the holder and make sure it's secure. You can improve it's stability by using the orange rubber pad.
4. Press up on the button at the bottom of the stick to turn the stick on, a light will come on.
5. Go to the settings on your phone and turn on Bluetooth.
6. You will see the selfie-stick selection, pick this Bluetooth provider to connect to.
7. Adjust the length and angle of the stick for the pictures you want to capture.
8. Open up the camera on your phone.
9. Press the raised button on the stick to capture your pics.
10. Have fun and adventure!

Find it for yourself on Amazon!

Now to introduce y'all! The adorable guy in these pictures with me is my wonderful boyfriend Fred! 

I'm so happy to introduce him to all of you and I'm really excited for you guys to see him a lot more in upcoming posts! I'm so blessed to have his unwavering support, love and care with my blog and in all things. 

& He's excited for you guys to get to know him a little better too. 

We hope you all have a sweet day!

Christina xx
Here are some of the pictures we took!

This last picture is a photo captured during a video we made using the selfie stick.


Thursday, July 2, 2015

Recipe: Liberty Lemonade

Hey everyone--

Here is a refreshing, patriotic drink recipe just in time for your holiday weekend. It's super simple to make and perfect to share with your friends and family as you celebrate! Give it a try this weekend!

Have a very happy 4th of July everyone! 

Christina xx

Ingredients: Lemonade, Sugar, Frozen Strawberries, Frozen Blueberries 

Steps: 1. Start with lemonade. I used Minute Maid lemonade that I bought already made, but feel free to make your own lemonade to start with.

2. Sweeten the lemonade with sugar. For a punch bowl size of filled lemonade, I used 1 cup of sugar. You can put however much sugar in it as needed to get it as sweet as you want. 
(Skip this step if you don't want to sweeten it)

3.  Next add strawberries.

4. Then add blueberries.

5. Pour your lemonade into a glass and add a straw & enjoy! 

(P.S- Be sure to drink within 24 hours because the fruit can ferment
.. or just wait to add the fruit until you're ready to drink it!
P.S.S- This warning is here because I made this mistake!)

Thankful

Thankful for our freedom!

 Have a Happy 4th of July weekend everyone!

Christina xx

Monday, June 29, 2015

Pink Monday

Have a pink Monday everyone!

Christina xx

DIY: "Popsicle" Sponges

Hey everyone--

I first saw a "sponge" popsicle on The Jealous Curator Blog. I thought they were so cute and I knew I could make them myself! This is great if you're looking for a fun, fast and cheap DIY project for the summer!

Supplies: Sponges, Popsicle Sticks, Hot Glue Gun Sticks, Hot Glue Gun

Steps: 
1. Put a hot glue gun stick into your hot glue gun and plug it in.

2. Let the gun heat up for a couple minutes before use.

3. Take a sponge and at the bottom of it, in the center, gently pull the sponge in opposite directions to create a hole in the center.

4. Once the hole is there, pull apart the sides of the sponge in different directions (carefully!) and use your finger to make it a bit deeper.

5. Take a popsicle stick and put it into the hole that you created.

6. Continue to push it into the sponge until a good amount is left outside of the sponge to look more like a real popsicle.

7. Take the glue gun and place some glue along the inside edge of the sponge and press it down onto the stick for a few seconds.

8. Flip over the sponge and repeat step 7 to the other side.
(Step 7 and 8 are to close the openings and connect the sponge to the stick)

9. Set aside the sponge and let it dry for at least 20 to 30 minutes.

Once it's dry, you have an adorable popsicle sponge to make cleaning more fun!  

Have a sweet day!
Christina xx


Friday, June 19, 2015

Recipe: Gummy-Bear Popsicles

Hey everyone--

I first saw a gummy-bear popsicle recipe on Laurenconrad.com. They looked so sweet and so cute, I knew I had to try some this summer season! On the Lauren Conrad Blog they suggested using coconut water or Gatorade as the liquid, but I used pink lemonade! I love pink lemonade and I adore gummy-bears so I thought they turned out awesome! If you're looking for a fun, easy, summer popsicle recipe, keep reading!

Ingredients: Pink Lemonade, Gummy-Bears, Ice Pop/ Popsicle Mold, Freezer

Steps:

1. Take the sticks/bottoms out of each slot and make sure your ice pop/popsicle mold is clean and ready to go!

2. Pour pink lemonade evenly throughout the mold. Don't fill it to the brim, because dropping the gummy-bears in it will make the liquid rise and you still have to place the stick/bottom back into it too.

3. Drop as many gummy-bears as you'd like in each slot.

4. Place the stick/bottom back into each slot.

5. Put the ice pop mold into the freezer.

6. Leave the mold in the freezer for at least 2 hours to freeze into solid popsicles.

7. After about 2 hours you can take the mold out of the freezer and the popsicles out of the mold. (You might have to jimmy and shake the stick/bottom a bit to get it to come out, but it should be fairly smooth and easy!)

Your yummy gummy popsicles are now ready to be enjoyed and shared!

Have a sweet day!
Christina xx

Sunday, February 9, 2014

Fashion Flashback

Oh summer where are you? I miss brights and pastels so terribly much. 
My winter wardrobe is boring me.

Christina xx