Pages


Showing posts with label fun. Show all posts

Saturday, October 31, 2015

Fun Halloween Looks for Long Locks (Part 2- Magical Mermaid) x Irresistible Me

Hey everyone! --

Happy Halloween!!!!!

 For Part 2, of this Halloween post with Irresistible Me I decided to transform into a Mermaid of course! When I think of long hair, I think mermaid hair. So it only seemed fitting to include a mermaid post! Also, let's be honest, if there's any excuse to dress up like a mermaid I'll do it. I think it's soo fun to go crazy with glitter and all the pearls and jewels I can find! I wish I could be a mermaid every year and I tend to go a little crazy with the glitter, so every Halloween I try to find the most sparkly costumes so I can have a little fun with it. Last year, my actual costume was a mermaid. My best friend and I made matching mermaid costumes and we spent so much time working on every detail and making sure they looked just right. There was a moment where we were standing together in our bathroom before the costume party just throwing glitter at each other haha. It was perfect. I will include a photo of us as mermaids last year. This year, I'm not a glittery creature I'm going as Eve and my fiance is WALL-E. He made both of our costumes because he's just that amazing.

 Also (back to hair) this hairstyle is the easiest! For a mermaid, waves are idea but in reality when you think mermaid you think length, period. So you can rock the mermaid costume whether your hair is straight, wavy or curly.

For makeup, this costume is so fun! You can really make the look however you want. I used a lot of loose glitter that you can buy at any craft supply store. Don't be glitter shy! You can also add some makeup setting spray to wet your skin and apply jewels or pearls wherever you want to place them to look like magical scales. 

For a costume, as I mentioned earlier I had a mermaid costume that I made last year out of a bra, a bodycon skirt, some tulle, some glue, a whole lot of jewels and seashells. If you don't have a mermaid costume, you can always wear skirt and a bathing suit top, or a top or dress that is iridescent, or even a shirt with a mermaid on it. I just happened to have a very mermaid-esque pair of earrings and starfish bracelet in my jewelry collection. I thought these added a very nice touch to the look!

Now to get the look:

Needed: curling wand, wave spray, a mermaid headpiece or accessory, gold chain, clips or bobby pins

If you're using extensions for this look, clip 'em in before you get started! Then make sure hair is nice and brushed. For this post I wore my  Irresistible Me Royal Remy clip-in hair extensions in the color Royal Platinum Blonde (613) 22 inch length
Then you just curl large sections of your hair around a wand to create a loose curl. I have a spiral curling wand that I use for every hairstyle so really any wand will do! Then you brush out the curls with your fingers to get a nice wave. 
I then played with my hair a bit and sprayed a little wave spray in my hair to create some volume and texture. 
I wanted my mermaid to have some accessories, so I chose to add a large pearl headband/tiara and I also took a gold chain that I bought at Michael's and used a small hair clip to clip it onto my hair behind my ear. 
You can use whatever you like! There is a ton of mermaid inspiration out there so I know you'll find something you like even if you don't like the way this looks!
I hope you all have an amazing, fun and safe Halloween,
full of many treats!

Christina xx
And here is the picture of last year's costumes that we made!

Monday, August 17, 2015

DIY: Retro '90s Inspired Notebook

Hey everyone--

So this is a super super easy DIY! I had so much fun decorating my notebook and I think it's a really great way to make a more "serious content" notebook a lot more cheerful. I needed a new notebook to track my daily health patterns and UC symptoms and I decided to make it as fun as possible. I decorated the notebook with sparkles and stickers of all things that make me happy! It's the happiest notebook that I own and helps keep my spirits up no matter what I write inside. You can use your notebook for whatever you like! It definitely doesn't have to be for something serious. However, I think it's a great idea for a notebook that you use often so you are reminded of all the things that make you smile. 

& Yeah I'm a '90s child and I really miss the crazy sticker obsessed products that were popular back in the day so I decided to bring it back!

.. I mean how cute are these stickers? All of them are ban.do, seriously my most favorite store ever! :D
The notebook is also from there. They're just rockin' my world lately.

Try it and tell me what you think!

Have a sweet day!
Christina xx

Supplies: notebook, some really cool stickers, hot glue gun,  gemstones, whatever else makes you happy!

Steps: 1. Make sure your notebook has a background that you like because there will most likely be open spaces! I chose this notebook with tiny polka dots.

2. Cover your notebook in stickers & have fun!

3. Then use a hot glue gun to glue on gems and any other fun pieces that you want on the notebook!

4. Set your notebook aside and let it dry for at least 20 minutes!

Thursday, July 30, 2015

Snapshot


The daily essentials..

 These cat-eyed sunnies
&
These two reminders: 
1. Nobody's perfect.
 2.Everything is OK!

Christina xx

Tuesday, July 21, 2015

Monday, July 6, 2015

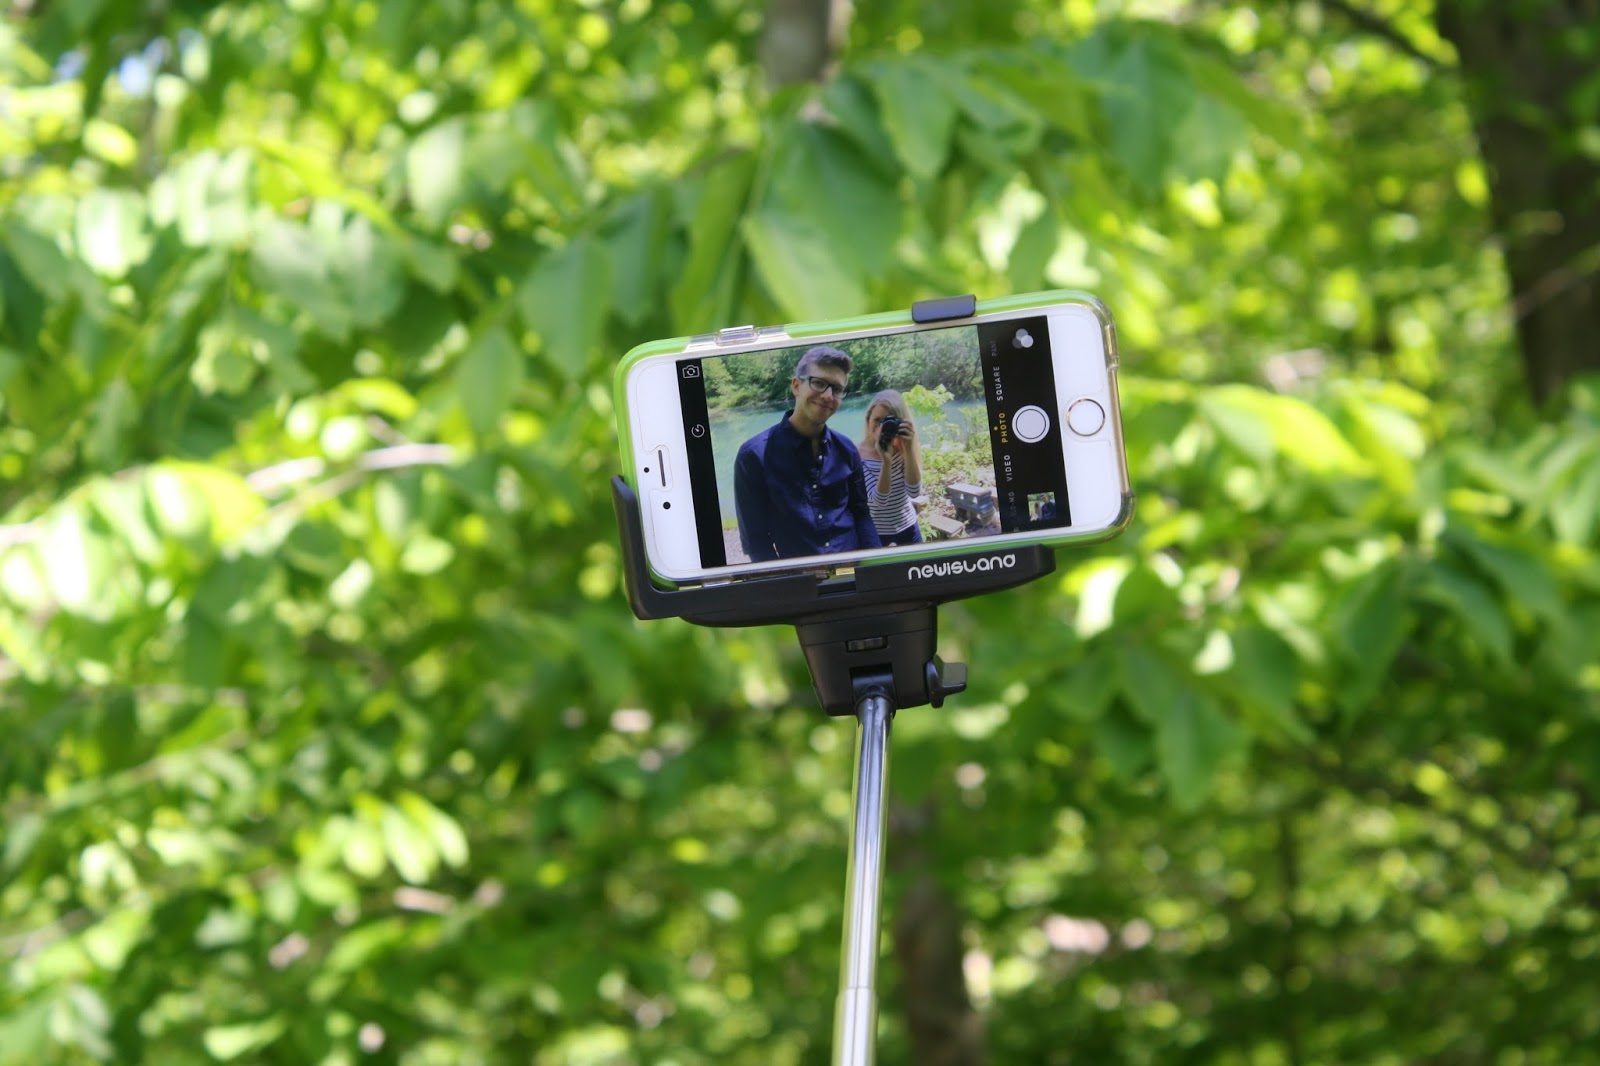
The Daily Sugar x Newisland Selfie Stick

Hey everyone--

So this post is pretty special for two reasons:
1. This selfie stick is super cool!
2. I'm introducing my boyfriend Fred to all of you! & He's the coolest.

We had so much fun adventuring and playing around with this Newisland Self-portrait Monopad "selfie stick". I had no idea all the things that it could do. I didn't know that you could connect your phone to the Bluetooth and control the buttons that way, but you can! It's really awesome! It has an adjustable 180 degree head, which allows you to position it according to each specific shot. It can also stretch to be crazy long. 

So here's how you use it:
1. Before you use your stick make sure that it's charged and ready to go!
2. Pull the sides of the actual holder on the stick to stretch it and make room for the phone.
3. Place your phone in the holder and make sure it's secure. You can improve it's stability by using the orange rubber pad.
4. Press up on the button at the bottom of the stick to turn the stick on, a light will come on.
5. Go to the settings on your phone and turn on Bluetooth.
6. You will see the selfie-stick selection, pick this Bluetooth provider to connect to.
7. Adjust the length and angle of the stick for the pictures you want to capture.
8. Open up the camera on your phone.
9. Press the raised button on the stick to capture your pics.
10. Have fun and adventure!

Find it for yourself on Amazon!

Now to introduce y'all! The adorable guy in these pictures with me is my wonderful boyfriend Fred! 

I'm so happy to introduce him to all of you and I'm really excited for you guys to see him a lot more in upcoming posts! I'm so blessed to have his unwavering support, love and care with my blog and in all things. 

& He's excited for you guys to get to know him a little better too. 

We hope you all have a sweet day!

Christina xx
Here are some of the pictures we took!

This last picture is a photo captured during a video we made using the selfie stick.


Monday, June 29, 2015

DIY: "Popsicle" Sponges

Hey everyone--

I first saw a "sponge" popsicle on The Jealous Curator Blog. I thought they were so cute and I knew I could make them myself! This is great if you're looking for a fun, fast and cheap DIY project for the summer!

Supplies: Sponges, Popsicle Sticks, Hot Glue Gun Sticks, Hot Glue Gun

Steps: 
1. Put a hot glue gun stick into your hot glue gun and plug it in.

2. Let the gun heat up for a couple minutes before use.

3. Take a sponge and at the bottom of it, in the center, gently pull the sponge in opposite directions to create a hole in the center.

4. Once the hole is there, pull apart the sides of the sponge in different directions (carefully!) and use your finger to make it a bit deeper.

5. Take a popsicle stick and put it into the hole that you created.

6. Continue to push it into the sponge until a good amount is left outside of the sponge to look more like a real popsicle.

7. Take the glue gun and place some glue along the inside edge of the sponge and press it down onto the stick for a few seconds.

8. Flip over the sponge and repeat step 7 to the other side.
(Step 7 and 8 are to close the openings and connect the sponge to the stick)

9. Set aside the sponge and let it dry for at least 20 to 30 minutes.

Once it's dry, you have an adorable popsicle sponge to make cleaning more fun!  

Have a sweet day!
Christina xx


Friday, June 19, 2015

Recipe: Gummy-Bear Popsicles

Hey everyone--

I first saw a gummy-bear popsicle recipe on Laurenconrad.com. They looked so sweet and so cute, I knew I had to try some this summer season! On the Lauren Conrad Blog they suggested using coconut water or Gatorade as the liquid, but I used pink lemonade! I love pink lemonade and I adore gummy-bears so I thought they turned out awesome! If you're looking for a fun, easy, summer popsicle recipe, keep reading!

Ingredients: Pink Lemonade, Gummy-Bears, Ice Pop/ Popsicle Mold, Freezer

Steps:

1. Take the sticks/bottoms out of each slot and make sure your ice pop/popsicle mold is clean and ready to go!

2. Pour pink lemonade evenly throughout the mold. Don't fill it to the brim, because dropping the gummy-bears in it will make the liquid rise and you still have to place the stick/bottom back into it too.

3. Drop as many gummy-bears as you'd like in each slot.

4. Place the stick/bottom back into each slot.

5. Put the ice pop mold into the freezer.

6. Leave the mold in the freezer for at least 2 hours to freeze into solid popsicles.

7. After about 2 hours you can take the mold out of the freezer and the popsicles out of the mold. (You might have to jimmy and shake the stick/bottom a bit to get it to come out, but it should be fairly smooth and easy!)

Your yummy gummy popsicles are now ready to be enjoyed and shared!

Have a sweet day!
Christina xx