

Showing posts with label treat. Show all posts
Showing posts with label treat. Show all posts
Thursday, July 30, 2015
Snapshot

Monday, July 6, 2015

Monday, June 29, 2015
DIY: "Popsicle" Sponges

Hey everyone--
I first saw a "sponge" popsicle on The Jealous Curator Blog. I thought they were so cute and I knew I could make them myself! This is great if you're looking for a fun, fast and cheap DIY project for the summer!


Wednesday, June 24, 2015
Recipe: Ooey Gooey Cookie Sandwiches

Hey everyone--
This yummy recipe is an adapted mix of two that I found on Pinterest:
I wanted to make cookie sandwiches but I wanted to fill them with a strawberry flavored buttercream because I was making them for my sweet boyfriend Fred! Strawberries are his favorite so I wanted to add some strawberry flavor to the sandwiches! I think these are a really yummy sweet treat for the summertime.
Note: These are very gooey and will melt in your hands! So keep some napkins close by!
Have a sweet day!
Christina xx
Ingredients:
Frosting: 1/2 cup + 2 tbsp strawberry puree, 1/2 cup unsalted butter, 1/4 cup salted butter, 2 1/2- 2 3/4 cups powdered sugar, 1/4 tsp vanilla extract
Cookies: 2 cups flour, 2 tsp cornstarch, 1 tsp baking soda, 1/2 tsp salt, 3/4 cup unsalted butter, 3/4 cup light brown sugar, 1/4 cup granulated sugar, 1 egg, 2 tsp vanilla extract, 1 cup mini chocolate chips
Steps:
Frosting: 1. Put the strawberry puree in a small pan and heat mixture over medium-low heat.
2. Stir occasionally and continue to let simmer until it's been reduced by about 2/3 to 3 tsp. This will take about 10 - 15 minutes.
3. Then, pour the puree in a bowl and let freeze until cool.
4. In a bowl, whip unsalted and salted butter together.
5. Mix in 1 cup of powdered sugar.
6. Blend in the reduced strawberry puree.
7. Put in the vanilla extract.
8. Add 1 1/2 cups of powdered sugar and continue to mix until frosting is fluffy.
9. Add an additional 1/4 cup of powdered sugar until you get the perfect fluffiness.
Cookies: 1. In a large bowl, mix the butter together until creamy.
2. Add in the brown sugar.
3. Add in the granulated sugar and mix all together until fluffy.
4. Mix in the egg.
5. Mix in the vanilla.
6. In a separate bowl, mix together the flour, cornstarch, baking soda and salt.
7. Add in chocolate chips and mix for about 5 seconds.
8. Cover dough with plastic wrap and let chill for at least 1 hour, 2 hours preferred.
9. Remove the cookie dough from the refrigerator and let sit at room temperature for 10 minutes.
10. Preheat oven to 350 degrees F.
11. Roll the dough into balls.
12. Bake the dough balls for 8-10 minutes, or until golden brown around the edges.
13. Let the cookies cool for at least 30 minutes.
Then: 1. Sandwich the frosting between two cooled cookies to create the sandwich!
& Enjoy!


Ingredients:
Frosting: 1/2 cup + 2 tbsp strawberry puree, 1/2 cup unsalted butter, 1/4 cup salted butter, 2 1/2- 2 3/4 cups powdered sugar, 1/4 tsp vanilla extract
Cookies: 2 cups flour, 2 tsp cornstarch, 1 tsp baking soda, 1/2 tsp salt, 3/4 cup unsalted butter, 3/4 cup light brown sugar, 1/4 cup granulated sugar, 1 egg, 2 tsp vanilla extract, 1 cup mini chocolate chips
Steps:
Frosting: 1. Put the strawberry puree in a small pan and heat mixture over medium-low heat.
2. Stir occasionally and continue to let simmer until it's been reduced by about 2/3 to 3 tsp. This will take about 10 - 15 minutes.
3. Then, pour the puree in a bowl and let freeze until cool.
4. In a bowl, whip unsalted and salted butter together.
5. Mix in 1 cup of powdered sugar.
6. Blend in the reduced strawberry puree.
7. Put in the vanilla extract.
8. Add 1 1/2 cups of powdered sugar and continue to mix until frosting is fluffy.
9. Add an additional 1/4 cup of powdered sugar until you get the perfect fluffiness.
Cookies: 1. In a large bowl, mix the butter together until creamy.
2. Add in the brown sugar.
3. Add in the granulated sugar and mix all together until fluffy.
4. Mix in the egg.
5. Mix in the vanilla.
6. In a separate bowl, mix together the flour, cornstarch, baking soda and salt.
7. Add in chocolate chips and mix for about 5 seconds.
8. Cover dough with plastic wrap and let chill for at least 1 hour, 2 hours preferred.
9. Remove the cookie dough from the refrigerator and let sit at room temperature for 10 minutes.
10. Preheat oven to 350 degrees F.
11. Roll the dough into balls.
12. Bake the dough balls for 8-10 minutes, or until golden brown around the edges.
13. Let the cookies cool for at least 30 minutes.
Then: 1. Sandwich the frosting between two cooled cookies to create the sandwich!
& Enjoy!


Saturday, November 30, 2013
November's Treat: Mini Pumpkin Pies

In honor of Thanksgiving week, I decided to make these adorable mini pumpkin pies. I knew I had to try these the minute that I saw them on the Little Bit Funky blog. Follow these steps to make your own mini pies!
Ingredients:
1 15 oz can of pumpkin puree, 2 eggs, 1 12 oz can of evaporated milk, 2 tsp of pumpkin pie spice, 3/4 cup of sugar, 1/2 tsp of salt, 2 boxes of ready made pie crust, 1 cookie cutter (circle or heart shape), cooking spray, whipped cream
Instructions:
1. First, spray muffin tin with cooking spray.
2. Unroll ready made crust and cut out shapes with cookie cutter.
3. Place cut out crust into each muffin cup. You will need to work with a bit to create the shape you want.
4. Combine the sugar, pumpkin pie spice, eggs, pumpkin puree and salt together. Once everything is combined, stir in the evaporated milk.
5. When the mixture is combined, pour into each muffin cup. The mixture can reach almost to the top of the crust.
6. Bake at 350 for 30-40 minutes, depending on your oven. ( Mine were done a little after 30 minutes) You can check to see if they're done by putting a knife in the center, if it comes out clean they are done.
7. Let the pies cool and then garnish with whipped cream. The pies are now ready to enjoy and share with friends!
Christina xxoo


 |
 |
Thursday, October 31, 2013
Happy Halloween!

I love this holiday! A few of my Halloween favorites include: trick-or-treaters, spooky treats and dressing up! I'm still under the weather today, but I hope feel better for the weekend festivities... Nobody likes a sick fairy.
Happy Halloween & Trick-or-Treat! What's your costume this year?
Christina xxoo
Tuesday, October 29, 2013
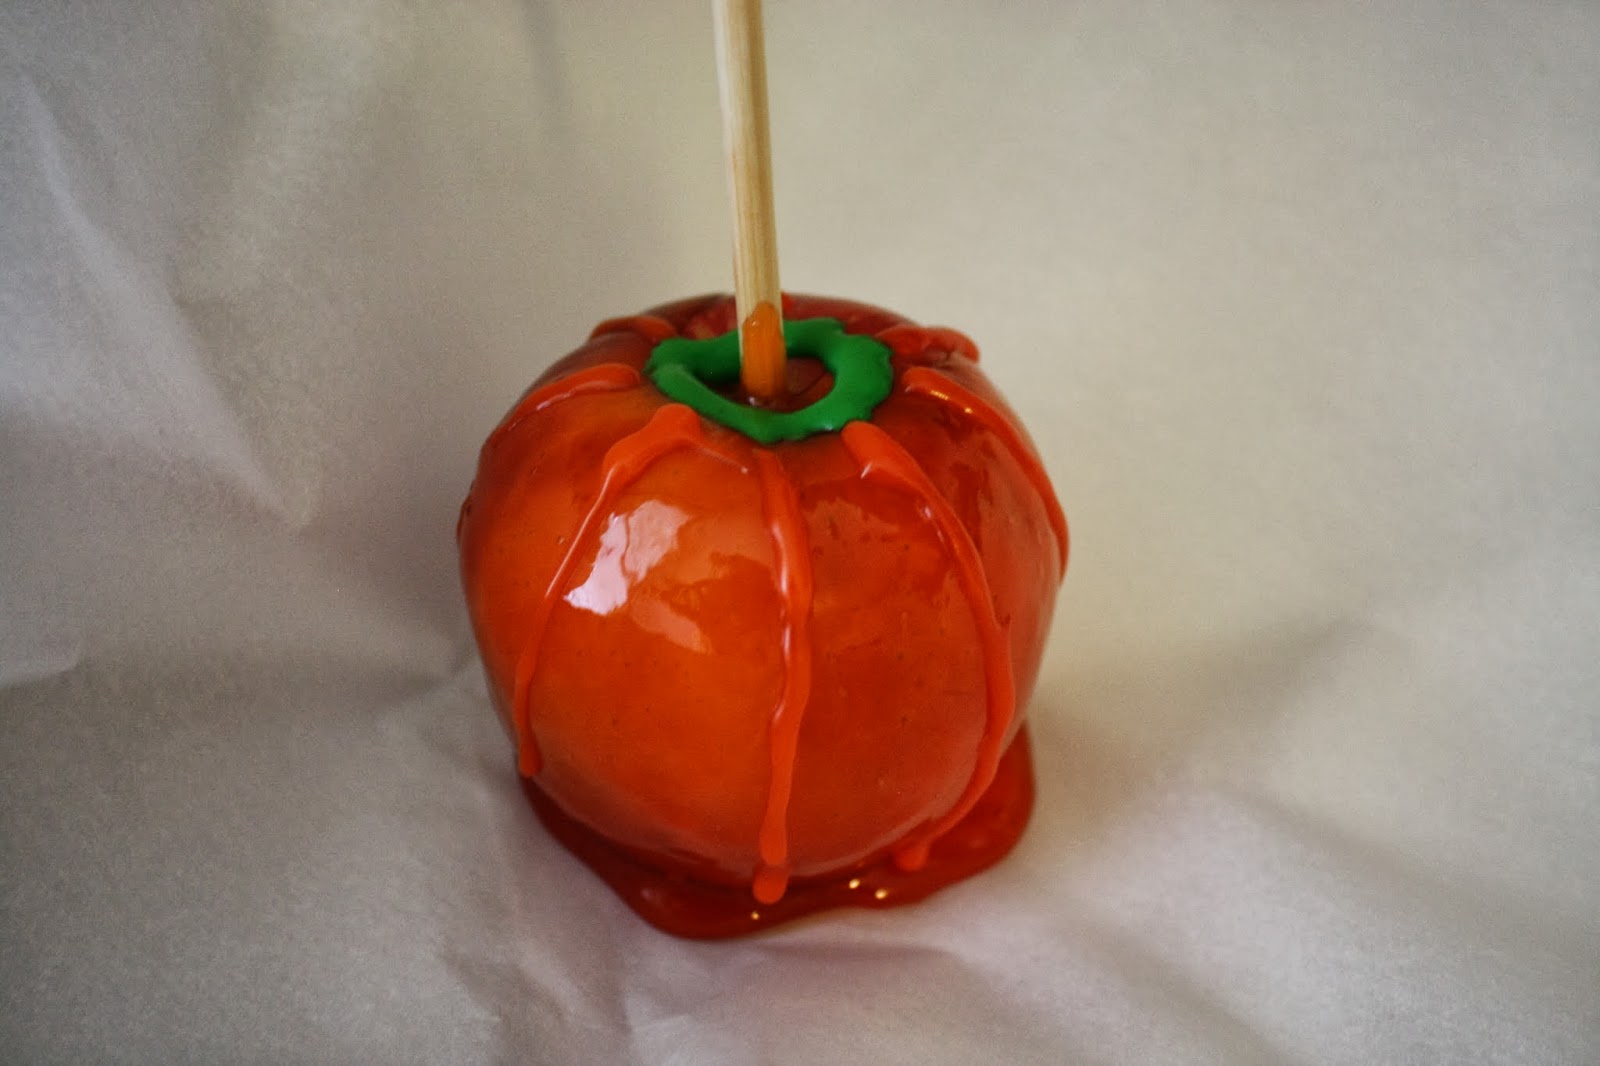
October's Treat: "Pumpkin" Candy Apples

This recipe was supposed to be posted yesterday, but I had to go to the hospital. Nothing serious, I'm just sick! Sorry for the delay. Anyway, I'd never made candy apples until these and I'd always wanted to. I thought that these were adorable. Give me any recipe that mixes apples and pumpkins during the month of October and I'm in. I hope you all enjoy these as much as I did!
Ingredients: apples, large kabob or popsicle sticks, orange gel food coloring, green and orange frosting, 1 1/2 cup of sugar, 1 cup of water, 1 cup of light corn syrup, parchment paper, candy thermometer
Instructions:
1. Prepare by washing the apples and laying down parchment paper onto the plate/container that apples will be placed on.
2. Remove the stems from the apples and stick the kabob/popsicle sticks into the center of the apples.
3. In a pot on stove top, combine sugar, light corn syrup and water.
4. Stir mixture on high heat until it starts to boil.
5. Once mixture is boiling, stop stirring and place candy thermometer into the pot.
6. Once the mixture reaches 285 degrees Farenheit, lower the heat and put orange food coloring into the mix. (How much food coloring you should use really just depends. Start by adding 1/2 tsp and continue to add more to get the color you like.)
7. Dip apples into the candy mixture. Make sure each apple is completely covered. & Dip apples as quickly as possible.
8. Then, let the excess mixture drip off of the apple back into the pot.
9. Next, place the apple on parchment paper and let dry.
10. Use orange icing to draw lines down the apple, to imitate that of a pumpkin.
11. Then, use green icing to draw a circle around the top of the apple, to imitate a pumpkin's stem and leaves.
12. Let the frosting on the apples dry and you are finished! Enjoy your "pumpkin" apples with some friends and fall fun!
Christina xxoo



Subscribe to:
Posts (Atom)